), elements using an ID, and classes if you use a '.' to prefix the class name.
Usage to remove our postData tag that indicates that LD+Json is being used: removeStr(value, "postData")
Usage to remove the 'foo' class from a string: removeStrBetween(str, '.foo');
*/
var removeStrBetween = function(str, selector) {
// Create a new container to operate on
var wrapped = $("
" + str + "
");
// Remove the content between the tags.
wrapped.find(selector).remove();
// Return it
return wrapped.html();
}
// Function to truncate and add an elipsis if the text exceeds a certain value
function truncateWithEllipses(text, max) {
return text.substr(0,max-1)+(text.length>max?'...':'');
}
function stripHtml(html){
html.replace(/<[^>]*>?/gm, '');
return html;
}
// Determine if a string has a space
function hasWhiteSpace(s) {
const whitespaceChars = [' ', '\t', '\n'];
return whitespaceChars.some(char => s.includes(char));
}
// ColdFusion like string functions
// ReplaceNoCase, scope is either 'all' or 'one'.
// Gregory Alexander
function replaceNoCase(string,subString,replacement, scope){
if (scope == 'all'){
// i is a RegEx ignore case flag, g is global flag
var regEx = new RegExp(subString, "ig");
} else {
// i is an RegEx ignore case flag
var regEx = new RegExp(subString, "i");
}
// i is an ignore case flag, g is global flag
var regEx = new RegExp(subString, "ig");
var result = string.replace(regEx, replacement);
return result;
}
// ColdFusion like list functions
function listLen(list, delimiter){
// Gregory Alexander
if(delimiter == null) { delimiter = ','; }
var thisLen = list.split(delimiter);
return thisLen.length;
}
function listGetAt(list, position, delimiter, zeroIndex) {
// Gregory Alexander
if(delimiter == null) { delimiter = ','; }
if(zeroIndex == null) { zeroIndex = true; }
list = list.split(delimiter);
if(list.length > position) {
if(zeroIndex){
// Better handling for JavaScript arrays
return list[position];
} else {
// Handles like the CF version without a zero-index
return list[position-1];
}
} else {
return 0;
}
}
function listFind(list, value, delimiter) {
// Adapted from a variety of sources by Gregory Alexander
var result = 0;
if(delimiter == null) delimiter = ',';
list = list.split(delimiter);
for ( var i = 0; i < list.length; i++ ) {
if ( value == list[i] ) {
result = i + 1;
return result;
}
}
return result;
}
// Compares two lists of comma seperated strings. Used to determine if the selected capabilities match the default capabilities for a given role. Function based on the listCompare method found in cflib.
function listCompare(string1, string2){
// Adapted from a variety of sources by Gregory Alexander
var s = string1.split(",");
for(var k = 0 ;k < s.length; k++){
if(string2.indexOf("," + s[k] + ",") ){
return true;
}
}
return false;
}
// Adds a value to a comma separated list. Will not add the value if the list already contains the value.
function listAppend(list, value) {
// Adapted from a variety of sources by Gregory Alexander
var re = new RegExp('(^|\\b)' + value + '(\\b|$)');
if (!re.test(list)) {
return list + (list.length? ',' : '') + value;
}
return list;
}
// Removes a value to a comma separated list. Based on the ListDeleteValue function by Ben Nadel CF fuction https://gist.github.com/bennadel/9753040
var listDeleteValue = function(list, value){
// Adapted from a variety of sources by Gregory Alexander
var values = list.split(",");
for(var i = 0 ; i < values.length ; i++) {
if (values[i] == value) {
values.splice(i, 1);
return values.join(",");
}
}
return list;
}
// URL functions
//
// parseUri 1.2.2
// (c) Steven Levithan
// MIT License
/*
Splits any well-formed URI into the following parts (all are optional):
----------------------
- source (since the exec method returns the entire match as key 0, we might as well use it)
- protocol (i.e., scheme)
- authority (includes both the domain and port)
- domain (i.e., host; can be an IP address)
- port
- path (includes both the directory path and filename)
- directoryPath (supports directories with periods, and without a trailing backslash)
- fileName
- query (does not include the leading question mark)
- anchor (i.e., fragment) */
function parseUri (str) {
var o = parseUri.options,
m = o.parser[o.strictMode ? "strict" : "loose"].exec(str),
uri = {},
i = 14;
while (i--) uri[o.key[i]] = m[i] || "";
uri[o.q.name] = {};
uri[o.key[12]].replace(o.q.parser, function ($0, $1, $2) {
if ($1) uri[o.q.name][$1] = $2;
});
return uri;
};
parseUri.options = {
strictMode: false,
key: ["source","protocol","authority","userInfo","user","password","host","port","relative","path","directory","file","query","anchor"],
q: {
name: "queryKey",
parser: /(?:^|&)([^&=]*)=?([^&]*)/g
},
parser: {
strict: /^(?:([^:\/?#]+):)?(?:\/\/((?:(([^:@]*)(?::([^:@]*))?)?@)?([^:\/?#]*)(?::(\d*))?))?((((?:[^?#\/]*\/)*)([^?#]*))(?:\?([^#]*))?(?:#(.*))?)/,
loose: /^(?:(?![^:@]+:[^:@\/]*@)([^:\/?#.]+):)?(?:\/\/)?((?:(([^:@]*)(?::([^:@]*))?)?@)?([^:\/?#]*)(?::(\d*))?)(((\/(?:[^?#](?![^?#\/]*\.[^?#\/.]+(?:[?#]|$)))*\/?)?([^?#\/]*))(?:\?([^#]*))?(?:#(.*))?)/
}
};
// Dump function. Use like you would with cfdump.
// function to dump out a a javascript object.
function mydump(arr,level) {
var dumped_text = "";
if(!level) level = 0;
var level_padding = "";
for(var j=0;j \"" + value + "\"\n";
}
}
} else {
dumped_text = "===>"+arr+"<===("+typeof(arr)+")";
}
console.log(dumped_text);
}
Galaxie blog allows you to upload and host your own local videos. Your video will be placed at the top of the blog post and will capture your readers' attention. This interface will also allow you to create closed captions (CC) on top of your video using a WebVTT File and cover your initial video with an optional image.
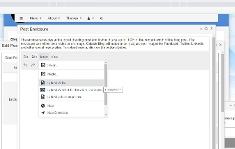
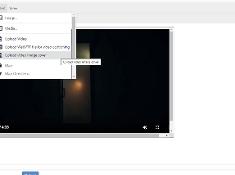
To upload a video to be included at the top of your blog post, log into the administration site, find your post, and open the Edit Post Interface. Then, click on the Enclosure Editor and click on the camera image labeled 'upload video.' Alternatively, you can select Insert—Upload Video using the Enclosure Editor.
Ensure your videos are compressed, especially when using a hosting provider. Images that exceed the server's upload settings will fail to upload.
You can drag and drop an HTML5 video onto the upload video interface, select a video from your system, or use your camera. Only valid HTML5 video formats will be shown if you are browsing for a file.
The uploader should provide a video preview with the file's name.
You can add the video title by clicking on the pencil icon underneath the video.
If you chose the wrong file, click on the x icon next to the video to remove it and select another video.
If everything looks good, click on the Upload File button below.
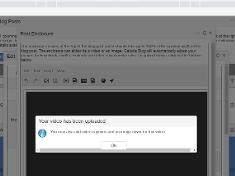
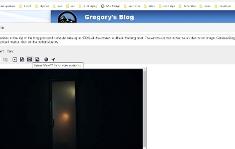
Once the video has been uploaded, a message will be displayed notifying you that you can add closed captions and create video image covers. After closing the dialog, a preview of your video will appear.
Adding Closed Captions
Closed captions may be added to your uploaded videos by uploading a WebVtt file.
A web VTT file is a simple text file and is easily constructed. It looks something like this:
WEBVTT - This file has cues.
14
00:01:14.815 --> 00:01:18.114
- More folks need to like Galaxie Blog on Gregory's git hub project.
15
00:01:18.171 --> 00:01:20.991
- Its an awesome project
16
00:01:21.058 --> 00:01:23.868
- [ pleading ]
- Please like my project!
Now that this little screed has been made, let's follow the steps to create your closed captions.
Before processing, check to see if your web server needs support for the following mime type: text/vtt. Consult your web server administrator for more information.
Create your web VTT file using a text editor.
Save the file with a .vtt extension.
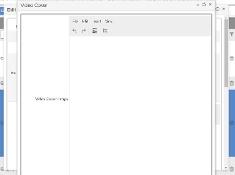
Click on the CC icon labeled Upload WebVTT File, or click on Insert - Upload WebVTT file.
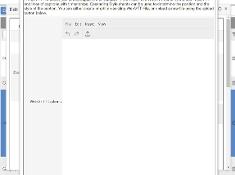
A WebVTT Editor will be pulled up.
Once the Web VTT Editor is displayed:
Click on the arrow icon to upload the VTT file that you have saved.
Another uploader interface will be shown.
Drag or drop the WebVTT file on top of the new interface, or use the finder to select the WebVTT file.
Click on the upload button.
Adding an Image Cover
The video image cover will cover the video in its initial state and disappear when it is displayed.
To add a video image cover:
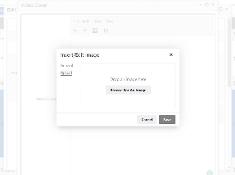
Click on the Upload Image Cover icon in the Enclosure Editor, or choose Insert - Upload image cover,
A new Insert/Edit Image interface will be displayed. You can upload your image cover using only one Insert/Edit icon.
You can upload a new image or specify the external URL to the image you want to use as the video cover.
If you are uploading, select the image you wish to as the image cover and click the submit button.
Your video should be previewed with your new image covering the video.
Gregory Alexander
Hi, my name is Gregory! I have several degrees in computer graphics and multimedia authoring, and I have been developing enterprise web applications for the last 25 years. I love web technologies and the outdoors and am passionate about giving back to the community.
This entry was posted on March 10, 2025 at 6:31 PM and has received 453 views.